Estimating Software

Blog Post 4
Auto Recondition, Dent Mobile App, Estimating Software, PDR Mobile App, PDR Shop, PDR Software, Recon Tech

Peak Season Staffing for Multi-Location PDR Operations

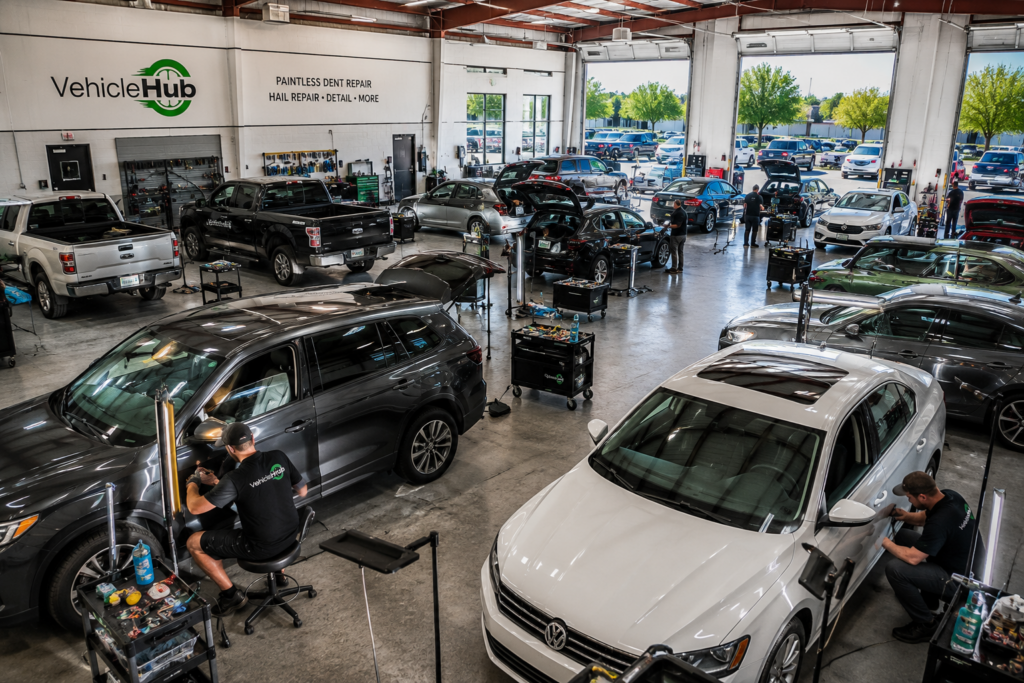
Peak Season Staffing for Multi-Location PDR Operations Running a single PDR shop during hail season is hard work. Running two, three, or five locations when a storm system rolls through your region is an entirely different management problem — and it breaks the operators who haven’t thought through it before the first car shows up. The challenge isn’t just having enough techs. It’s having the right techs in the right places, keeping production quality consistent across locations, protecting your best people from burnout, and maintaining the operational visibility to make decisions in real time. Many multi-shop operators can do one or two of those things well. The ones who do all four at scale are the ones building durable businesses. Why Multi-Location Staffing Is Harder Than It Looks In a single-location shop, you’re present. You see who’s working fast and who’s struggling. You notice when an estimate came in low. You can personally redirect a tech if a job is taking longer than it should. The shop runs, in part, on your direct observation. Specifically, multi-location operations remove that direct observation layer. Each location has its own rhythm, its own team dynamics, and its own manager making real-time calls. When a storm event hits and volume triples at two or more of your shops simultaneously, those managers are making decisions you can’t personally supervise — with labor resources that may be insufficient and a backlog that’s growing by the hour. Consequently, the systems and protocols you build before the season determine how well those managers perform when the pressure is on. Build a Float Tech Roster Before You Need It The single most important staffing tool for a multi-location hail operator is a bench of float techs: experienced contractors who can move to a market on short notice, integrate with your workflow quickly, and produce quality work without close supervision. This roster does not build itself in the middle of a storm event. Furthermore, the good float techs have multiple operators calling them at the same time — they go to the operators they already have a relationship with. Building those relationships in the slow season, paying them fairly when you use them, and making it easy for them to work with your shops is what gets you their number when you need it most. What to Look for in Float Techs The profile you’re looking for is different from a full-time hire. Float techs need strong production skills, but they also need flexibility and the ability to read a new shop’s rhythm quickly. They’re not going to know where your tools are or how your intake system works. Therefore, the lower the friction cost of onboarding them to your shop — and the clearer your work order and intake process — the faster they’re producing value. A shop with clear work orders, organized job records, and a straightforward intake process brings a float tech up to speed in an hour. A shop running on handwritten notes and verbal instructions takes days — and during storm season, you don’t have days. Protect Your Core Team The temptation during a major hail event is to run your best techs as hard and as long as they’ll let you. They’re the most capable, the most reliable, and the most efficient — so the rational move seems like using them as much as possible. That logic is correct over a week. Over a summer, it destroys people. The PDR techs who leave for competitors or go independent almost always cite burnout as the primary reason. Moreover, losing a top tech in August — because you ran them down in June and July — costs you far more than the margin you gained in those extra hours. Set Production Targets, Not Hours The most effective approach is to manage your core techs by production targets rather than time on the floor. A skilled tech who completes 45 panels a day and goes home at a reasonable hour is more sustainable than one grinding through 60 panels while accumulating fatigue injuries and resentment. Define what a strong day’s output looks like, set that as the target, and let techs leave when they hit it. Additionally, this model makes float tech contributions easy to measure. You’re not managing attendance — you’re managing output. That clarity works across locations and across employment arrangements. Build Operational Visibility Across Locations When you’re managing multiple locations through a surge event, you need to know — in real time — where each shop stands. How many vehicles are in the queue? Where are the bottlenecks? Which location is running out of capacity first? Are there jobs waiting on parts, insurance approvals, or customer callbacks? Without a centralized system, answering those questions requires calling each location manager and assembling a picture from their individual reports. That takes time you don’t have, and the picture is only as accurate as the last call. Centralize Job Records and Work Orders A shop management platform that gives you visibility across locations isn’t a luxury for multi-shop operators — it’s infrastructure. When every shop is entering job information, estimates, and work order status into the same system, you get a real-time view of the entire operation from any device. That visibility lets you make decisions: send a float tech to Location B because Location A is actually ahead of pace; redirect an adjuster appointment because the manager at Location C is overwhelmed; call a customer at Location A whose vehicle is done and move the job through to invoicing without waiting for the manager to have bandwidth. Standardize Your Intake Process Across Locations Each location running its own intake process creates inconsistency in your customer experience and makes cross-location management harder. Moreover, when a float tech moves between shops or a manager covers at a different location, they’re operating in an unfamiliar system — which slows them down precisely when speed matters most. Standardizing your intake checklist, estimate format, work order structure, and invoice process
Blog 1 Cover photo
Estimating Software, PDR Software, PDR Technique, PDR Tools, Uncategorized

How to Price PDR Jobs Profitably This Hail Season

How to Price PDR Jobs Profitably This Hail Season Peak hail season brings volume — but volume alone doesn’t guarantee profit. Many PDR shops run flat-out from June through August only to look at their books in September and wonder where the margin went. The answer, more often than not, comes back to pricing. Specifically, it comes back to inconsistency, missed add-ons, and estimates that were built to close the job rather than reflect the actual cost of doing it right. Getting your pricing strategy right before the season peaks isn’t just good business hygiene. It’s the difference between a summer that builds your shop and one that burns it out. Why PDR Pricing Breaks Down During Peak Season During slow months, most shops manage their estimating process pretty well. One or two people handle the quotes, the jobs are manageable, and mistakes get caught. Then a major storm hits, volume triples overnight, and suddenly three different people are estimating — each with their own mental framework for what a job is worth. Furthermore, the pressure to close jobs quickly leads to underquoting. Shops drop their prices to keep the lot moving, skip line items they’d normally include, or fail to flag access complications until the tech is already in the car. Consequently, the revenue is there on paper, but the margin has quietly disappeared. The good news is that most of these breakdowns are fixable. They stem from process gaps, not from a lack of skill. Build a Standardized Estimate Framework The foundation of sound PDR pricing is consistency. Every estimate your shop produces should come from the same framework — regardless of who’s writing it, how busy the lot is, or how fast the customer wants to move. Your estimate framework should address three things: the pricing method you use, the line items you always capture, and the thresholds that trigger add-ons. Choosing Your Pricing Method Most PDR shops price by the panel, by dent count, or by damage complexity. Each approach has tradeoffs. Per-panel pricing is fast and easy to explain to customers. Dent-count pricing is more precise on dense damage but can be difficult to verify. Complexity-based pricing gives you the most flexibility but requires well-calibrated estimators. The method matters less than the consistency. Pick the one that fits your operation and train everyone on it. Mixed methods across your team create customer confusion and internal margin leaks in equal measure. Line Items You Can’t Afford to Skip Beyond the core damage assessment, several line items frequently get left off estimates during busy periods. R&I (remove and install) on trim pieces, moldings, or tail lamps adds real time to the job. Access points behind body panels require additional labor. Edge damage near panel borders is more time-consuming than center damage. Additionally, blending may be necessary when PDR isn’t fully achievable on a given dent. Build these into your estimate template as explicit line items — even when the answer is zero — so estimators actively evaluate each one rather than defaulting to omission. Account for ADAS Recalibration Vehicles built after 2020 increasingly include cameras, radar modules, and ultrasonic sensors embedded in hoods, bumpers, A-pillars, and rear fascias. PDR work on panels near these components can affect sensor alignment — and in some cases, recalibration is required after the repair. Specifically, forward-facing camera systems mounted near the windshield header and front radar units embedded in grilles or bumpers are the most commonly affected. If your shop isn’t flagging these at the estimate stage, you’re either absorbing the recalibration cost or sending customers out the door with an uncalibrated system Neither outcome is acceptable. Add an ADAS flag to your intake checklist and make recalibration a standard line item on any estimate that touches a panel near a sensor. This protects your margin and your liability simultaneously. Audit Your Estimates Against Completed Jobs A pricing strategy is only as good as the feedback loop behind it. If your estimates are consistently coming in over or under the actual job cost, your estimating process needs adjustment — and you won’t know that without looking at the data. Set a monthly habit of reviewing completed jobs against their original estimates. Look for patterns. Are certain job types consistently underpriced? Are specific estimators regularly coming in low? Is there a category of add-on that almost never makes it onto the initial estimate? Moreover, this kind of review surfaces training opportunities before they turn into systemic margin problems. It takes less than an hour per month and directly improves the quality of every future estimate. Pricing Across Multiple Locations Multi-shop operators face an additional layer of complexity: keeping pricing consistent across locations that may be in different markets, serving different customer demographics, or staffed by different estimating teams. The temptation is to let each location manage its own pricing. In practice, this creates brand inconsistency and internal confusion when techs float between shops. A customer who got a quote at one location and visits another should receive a comparable estimate for comparable damage. Therefore, building a shared estimate framework that all locations use — with room for defined market adjustments where necessary — is worth the upfront effort. The right shop management software makes this easier by centralizing the estimate-building process and giving you visibility across locations. How Vehicle Hub Supports Pricing Discipline Vehicle Hub’s mobile app lets PDR shops build consistent, professional estimates from any device — in the lot, at intake, or on a hail-damaged vehicle in the field. Estimates feed directly into work orders, job records, and invoicing, so the whole job history lives in one place. For multi-shop operators, that consistency across locations is where the platform pays off most clearly. When every location is building estimates from the same framework and the data is all in one system, the monthly audit becomes a five-minute exercise instead of a spreadsheet archaeology project. Try Vehicle Hub free at vehiclehub.com. See how consistent estimating translates directly to improved margins

Glue Pull Technique
Auto Recondition, Dent Repair, Estimating Software, PDR Software, PDR Technique, PDR Tools, Uncategorized

Glue Pull PDR: When to Use It and How to Do It Right

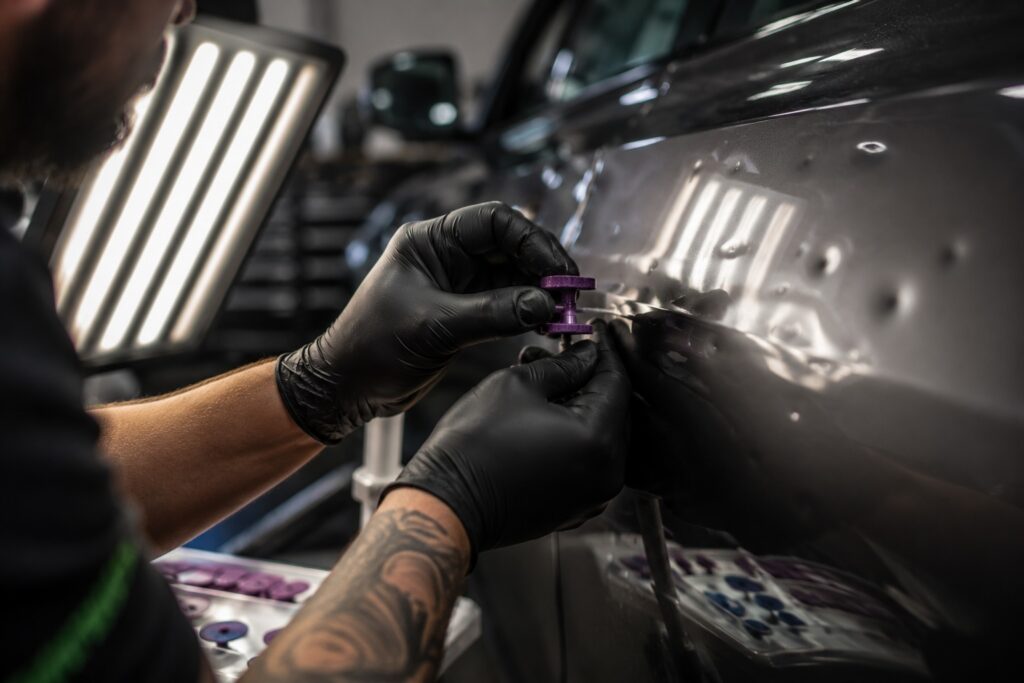
Glue Pull PDR: When to Use It and How to Do It Right Glue pulling has moved from an occasional workaround to a core PDR technique. On panels where rod access is limited, on damage that needs incremental movement, or on surfaces where you can’t risk marring with a tap down — glue is often the right call. But glue pulling done wrong is also one of the faster ways to put witness marks on a panel, burn up shop time re-pulling, or leave damage that’s harder to finish than what you started with. The technique is straightforward in principle. Getting it consistently right under real shop conditions — especially during high-volume hail season — takes a clear understanding of when and how. This guide covers the fundamentals: when glue pulling makes sense, how to set up the pull correctly, temperature and chemistry considerations, and the common mistakes that cost techs time and panels. When to Choose Glue Over a Rod Rods are the primary tool for most PDR work — faster, more direct, and more controllable for most dent types. Glue pulling earns its place in specific situations where rod access isn’t viable or where the approach to the damage dictates it. Limited or No Rod Access This is the most common reason to reach for glue. Sections of a door where internal structure blocks rod paths, areas behind reinforcements on newer vehicle platforms, certain roof damage scenarios near sunroof channels or structural rails — all of these create access problems that glue pulling solves cleanly. Before defaulting to R&I, evaluate whether the panel can be worked from the surface with a proper glue setup. For many common access limitations, glue is faster than the time cost of removal. Incremental Movement on Shallow, Wide Damage Large, shallow hail dents with gentle crowns often respond better to a series of glue pulls than to rod work. You can target specific areas within the dent, apply controlled upward force incrementally, and work the perimeter inward in a way that rod movement doesn’t always allow for from below. Sensitive Surfaces and Finishes Some older vehicles, certain factory finishes, and repainted panels don’t respond well to the contact of tap-down tools. Glue pulling lets you work the metal upward without any surface-side contact during the pull itself, reducing risk of finish damage during the repair process. When a Combination Approach Makes Sense On complex damage, glue and rod often work together — using glue to bring a stubborn high point down from above while a rod addresses the low areas from below. Don’t treat them as either/or tools. The best technicians use both on the same job when the damage calls for it. Setting Up the Pull Correctly The setup is where most glue pull problems originate. A well-applied tab on a well-matched glue formulation with the right tool gives you clean, controlled movement. A shortcut at any step in the setup compounds into wasted time and panel risk. Select the Right Tab Profile Glue tabs come in different profiles — round, star, rectangular, flex — and the right one depends on the dent shape. A small round tab concentrates force in the center of the dent. A larger star tab spreads force more evenly and works better on wider, shallower damage. Matching the tab footprint to the dent shape is the single biggest factor in pull efficiency. Don’t use a tab that’s significantly larger than the dent — the glue will bond to undamaged surrounding metal and you’ll lose control of where the force goes. Clean the Panel Surface Any surface contamination — wax, sealant, dust, fingerprints — reduces adhesion. Clean the repair area with IPA (isopropyl alcohol) immediately before applying glue. Don’t skip this on a busy day. Poor adhesion means you’ll re-pull the same dent while your efficiency numbers suffer. Apply Glue to the Tab, Not the Panel Load the glue onto the tab face, not directly onto the paint. You want consistent coverage across the tab footprint without excess glue that squeezes out to the panel edges and creates additional cleanup. One clean, even application. Set Time and Temperature Press the tab firmly to the panel and hold it — don’t just place it. The glue needs surface contact under pressure to bond properly. Wait for the glue to set appropriately for your formulation and the current ambient temperature. In summer shop conditions, this is typically faster than the glue manufacturer’s standard recommendation, which is usually written for cooler baselines. Temperature and Glue Chemistry: The Part Most Techs Underestimate Glue chemistry changes significantly with temperature, and June through August will expose any mismatch between your glue stick formulation and your shop environment. Hot Shop Temperatures A summer shop interior can easily reach 85-100F on a warm day. Standard or low-temp glue formulations that work fine in spring conditions will release tabs prematurely, give inconsistent adhesion, or fail mid-pull when the shop heats up. Use a high-temp glue stick rated for elevated temperatures. Test on a scrap panel in your actual shop conditions before committing to production work. Panel Surface Temperature A car that’s been sitting in the sun has a panel surface temperature well above the ambient shop temperature — sometimes 150F or higher. When a hot panel hits your bay, the glue formulation that’s right for 85F ambient can behave unpredictably. Let hot panels cool to shop temperature, or use a formulation rated for higher surface temps. Cold Weather Considerations (Off-Season) The opposite problem: in cooler months, standard glue can become brittle and lose pull strength. This guide is focused on summer/hail season use, but it’s worth knowing that glue chemistry management is a year-round consideration in regions with significant temperature variation. Pulling Technique: Speed, Angle, and Control Using a Pulling Bridge A pulling bridge applies force incrementally via a center screw, giving you controlled, adjustable upward pressure. This is the preferred tool for most glue pull work because it keeps the pull angle perpendicular to the

Toosl and Vhub App
Auto Recondition, Dent Repair, Estimating Software, Hail Season, PDR Software, PDR Tools

Best PDR Tools and Dent Lights for Hail Season 2026

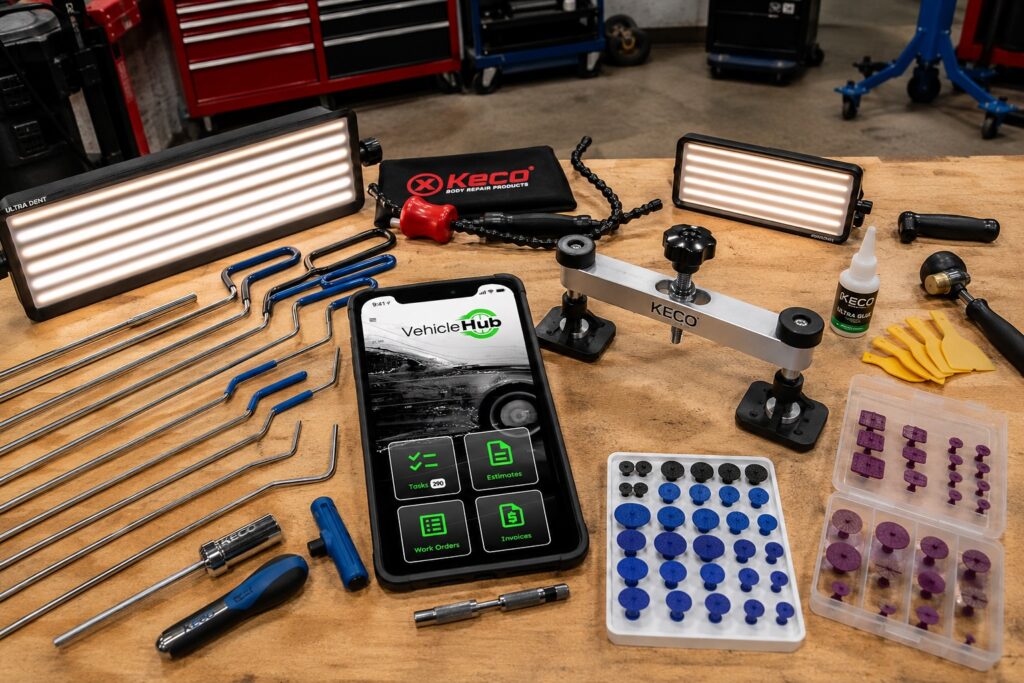
Best PDR Tools and Dent Lights for Hail Season 2026 Intro Hail season doesn’t care if your gear is ready. When a storm rolls through and 200 cars show up in your lot over three days, you’ll find out fast which tools hold up and which ones slow you down. This isn’t a listicle for hobbyists. This is a breakdown of the PDR equipment that serious technicians and shop operators are running this season — dent lights that give you an honest read on damage, rod sets that cover the common access points, and glue systems that don’t fight you on cold panels. If you’re gearing up for peak season or evaluating what to add before the next storm, this is the guide. Why Equipment Quality Actually Matters at Scale A single tech working a handful of cars a week can get by with mid-grade tools. A shop running 50+ hail jobs a week will expose every weakness in your equipment lineup. Poor dent lighting means techs are chasing shadows, misjudging depth and crown, and leaving work on the panel that a customer’s gonna find at pickup. A cheap light that works fine in a controlled environment becomes a liability under fluorescents with bad panel angles. Rod sets with limited reach mean techs are spending time on R&I (remove and install) for panels they should be able to access without it. That’s billable time going to setup instead of output. And glue systems — if the formulation isn’t matched to the temperature and panel type, you’re fighting the pull all day. Good glue chemistry isn’t optional in peak season; it’s the difference between clean work and regluing the same dent three times. PDR Dent Lights: What to Look For LED Line Boards The industry standard for most hail work. LED line boards give you tight, consistent reflection across flat and curved panels, making it easy to read damage size, depth, and whether you’ve moved metal. Adjustable arm mounts and stand heights are non-negotiable in a hail shop — you need flexibility between hoods, roofs, and door panels. What matters: uniform LED spacing (no hot spots), color temperature around 5000-6500K for accurate surface reading, and a housing that can take daily abuse on the shop floor. Specialty Lights for Crowns and Edges Line boards don’t tell you everything on high-crown panels or near body lines. Technicians working complex hail damage routinely keep a smaller, more directional light — often a snake light or a compact board — for reading the tension near raised edges and body character lines where a full board can create misleading reflections. Overhead Fluorescent Setups Some shops set up fixed fluorescent bar arrays overhead for initial triage — letting you walk a row of cars and quickly sort minor, moderate, and severe damage before assigning jobs. It’s not a substitute for proper dent lighting at the bay, but it speeds up the intake process significantly on high-volume days. PDR Rod Sets: Coverage Is Everything Hail damage shows up everywhere — roofs, hoods, deck lids, door panels, quarter panels, pillars. A rod set that doesn’t cover your common access points means techs are improvising or doing R&I they shouldn’t need to. Standard Steel Rods Every shop needs a solid core set of standard steel rods covering the common lengths and tip profiles for door panels, hood structures, and deck lids. Look for rods with good flex-to-stiffness ratios — too stiff and you’ll overshoot movement on thin modern steel; too flexible and you lose control on deep dents. Interchangeable Tip Systems For hail work specifically, interchangeable tip rods let technicians adapt quickly between flat-tip tapping work and hook profiles for under-panel access without switching to a completely different rod. It sounds like a small thing until you’re watching a tech spend three minutes swapping tools between every dent on a busy roof. Aluminum and Micro Rods Tight access areas on newer vehicle platforms — behind door reinforcements, inside pillar assemblies, around sunroof channels — often require micro rods and aluminum alternatives that flex into confined paths. As modern vehicles pack more structure into panels, rod coverage matters more, not less. Glue Pull Systems: Match Chemistry to Conditions Glue pulling has become a standard part of the hail toolkit, not a fallback. For panels where rod access is limited, or for working damage incrementally on sensitive surfaces, a reliable glue system is essential. Temperature-Rated Glue Sticks This is where shops run into problems. Using low-temp glue on a hot panel in June is going to cost you — tabs release too early, you lose your pull, and you risk marring the panel on release. Use glue formulations matched to your shop temperature and the panel surface temperature. This matters more in summer than any other time of year. Tab Systems and Pull Bridges Quality glue tabs (round, star, and flex profiles for different dent shapes) combined with a well-engineered pull bridge or slide hammer give you consistent, controlled pulls. Cheap tabs that don’t conform properly to the panel surface reduce pull efficiency and increase your chance of leaving witness marks. Managing Your Equipment in a High-Volume Shop Having the right tools matters. Having a system for tracking them matters just as much. In busy hail shops, tools walk. Rods end up in the wrong bay. Glue guns need refills nobody tracks. Lights get moved and not returned. The tech who shows up first gets the good setup; the one after lunch works with what’s left. Shops that manage this well assign equipment by bay and hold bays accountable. They do quick equipment checks at shift start. And they track their tool inventory the same way they track their job inventory — systematically, not from memory. Vehicle Hub’s work order system lets you tie equipment needs and notes directly to jobs, so you’re not running across the shop to figure out what’s assigned where. It’s a small thing that adds up across a 200-car hail week. Conclusion: Invest in Your

2
Estimating Software, PDR Software

A Complete Guide to Choosing the Best Hail Damage Repair Software

After a hailstorm, auto repair pros, auto dealerships, and insurance adjusters face a daunting situation-how to quickly and accurately assess vehicle damage and generate professional estimates. And that is where hail damage repair software comes in — a modern solution that replaces traditional pencil-and-paper methods with automated, data-driven processes. In the current market, there are so many choices that one may have when coming to the right software. This informative post breaks down the key factors to consider so you can confidently select a hail damage repair solution tailored to your business needs. Why Should You Hail Damage Repair Software? Hail damage can be unpredictable and widespread, resulting in dozens or even hundreds of vehicles may have to be checked after only one storm. It is time-consuming, subjective, and prone to human error due to the time-consuming nature of manually determining the number of dents, the condition of the panel, measurements, and pricing of the vehicle. The latest hail damage repair software is powered by developed technology, such as AI, image recognition, and mobile access, to speed up the process, make it more accurate, and construct an estimate in detail that customers and the insurers will rely on. The right tool not only makes your work run faster, but it also helps to enhance service quality, customer satisfaction, and profitability. Core Features to Look for in Hail Damage Repair Software Not all hail damage repair tools are created equal. We have mentioned below some of the key features you should evaluate when comparing options: 1. Accurate Damage Detection and Assessment The dents and imperfections that vehicles have in their surfaces are the core of any hail damage software. Artificial intelligence-based tools have the ability to identify and measure hail dents in a shorter period and with a higher degree of accuracy compared to their manual counterparts. AI-directed platforms scan uploaded photos or scanned images and automatically detect dent size, location, and severity – lessening the guesswork and accelerating the inspections. 2. Cost Estimation Precision An intense hail damage program must give exact estimates of costs, relying on the prevailing industry rates. The old-fashioned cost calculators are manual input-based; however, the sophisticated ones are based on stored matrices, such as the amount of dents, panel complexity, labor rates, and removal correction, and create an estimate that meets the real-world repair data. Other calculators even combine with insurance standards to be consistent. Take into account how the software converts the data on dents into dollars. Is it open to a custom labor rate? Does it consider the panel materials or regional modifications? Such abilities are essential to provide professional quotes. 3. Mobile Accessibility for On-Site Work The most excellent hail repair equipment is that which can be accessed using a mobile device, which means that the technician will be able to examine the vehicle in place, whether it is a dealership, auction, customer home, or salvage yard. Access through mobile devices implies that your team does not need to use the desktop computers in the shop, but on a tablet or a smartphone, they can take pictures of the damage and create estimates and reports. 4. Photo capturing and annotation The ability to capture images of destruction and draw on spots directly in the software is a big time-saver. Such visual record keeping improves the visibility among the customers, the insurers, and associates a particular number of dents with the corresponding repair costs. Enhanced visual reporting is more effective in communication and lessens conflicts over what was and was not included in a quote. 5.  Business Workflow Integration High-end hail repair solutions are integrated with other programs that you might be utilizing – be it CRM software, invoicing, work orders, and job tracking. This single collocation eradicates data silos and maintains your entire workflow in interrelation, between initial assessment and invoice payment. As an example, sophisticated applications are built to directly include cost calculators within larger recon or repair management systems, meaning that estimates are not a step in the project life cycle but instead a part of the project. Evaluating User Experience and Support After determining the key features that you need, take into account the user experience and customer service: 6. Intuitive Interface  Select software with which the technicians can be trained easily, particularly when they are not technologically advanced. An easy-to-use, clean interface will minimize the learning curve and also provide uniform results throughout your team. Navigation is easy, and the directions are clear, which implies improved adoption and efficiency. 7. Powerful Customer Service and Training  The strongest tool can do nothing without support. Search among vendors who provide value in onboarding, tutorials, live assistance, and updates. It is especially significant when the storms hit, and your team has to be in action right now. Cost Considerations  The cost of repairs of the hail damage software is not only about the sticker price when it comes to budgeting. Evaluate: Subscription vs. one-time license fees. Add-ons or module costs User or device limits Support and upgrade fees Not only cost but also invest in a solution that will give in saved time and accuracy. Why Does the Vehicle Hub Stands Out? With a wide range of available services, Vehicle Hub offers a smooth and powerful combination of options that satisfy the needs of hail damage professionals and reconditioning companies. Vehicle Hub is a modern AI-powered mobile-first design, and price controls enable your team to evaluate, estimate, and report on hail damage more quickly and accurately than it used to be. Vehicle Hub will give your business a competitive advantage in the stormy seasons by combining real-time photo scan, VIN scan, and professional reporting processes, which allow your business to remove inefficiencies and minimize job turnaround. Selecting the appropriate software to use in your business  The choice of the superior hail damage repair software is all about fitting functions with your unique procedures – you could be a mobile technician, service manager of a dealership, or the owner of a

© 2026 VehicleHub, LLC. All rights reserved
Scroll to Top